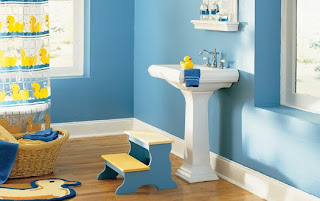
If you're tired of the dated look of your bathroom cabinet, but it's still perfectly functional, giving it a lick of paint is an economical way to give it a makeover without forking out for a brand new cabinet. Painting bathroom cabinets is easy to do and is a great way to give an outdated or worn-looking medicine cabinet a facelift. However, before you reach for your paintbrush, have a read through these tips.
1. First of all, check what your cabinet is made from - plastic laminated surfaces aren't suitable for painting, as the paint won't stick. However, wooden, metal and wood veneer cabinets can be painted successfully.
2. As with any kind of decorating, proper preparation is key. Rather than trying to paint round awkward bits and ending up with paint everywhere, it's best to unscrew and detach all the door hinges and handles and put them safely out of the way. It's much easier to remove your doors rather than attempt to paint them whilst attached to the cabinet.
3. Then give all your surfaces a good clean with TSP (trisodium phosphate), a common degreaser and cleaning agent that can be found in most DIY stores. Rinse with water and leave to dry before using sandpaper to sand down all the surfaces so they are smooth and ready to take the paint. This will create a lot of fine dust, which it's important to clean up properly using a Hoover or damp cloth.
4. Once all the surfaces of your cabinet are ready to be painted, stick masking tape around the edges that adjoin the wall and around the inside edges if you're not planning on painting the inside, this will help you achieve a neat finish.
5. You're then ready to paint. Use a brush or roller, depending on which you prefer to use. Rollers are particularly good for covering larger areas quickly and without leaving visible brushstrokes. Choose a satin enamel paint or specialist cabinet paint, which is available from most big hardware stores. There's a wide selection of colors to choose from.
6. Paint the inside of the doors first, leaving them to dry while you do the main body and frame, before moving on to the outside of the doors.
7. For a professional finish, you'll probably need to apply a second coat, or more. Follow the instructions on the tin, but usually it's advisable to wait several hours or overnight for the previous coat to dry before applying another.
8. Once you're satisfied with the color and finish, you can reassemble your cabinet by attaching the doors and handles. You could even fit new handles at this stage if you want to completely change your cabinet's appearance.
 As it was in the 16th and 17th centuries, Wimbledon's attraction remains its combination of convenient access to central London with the benefit of plentiful recreational facilities. Strong demand for homes, especially the larger properties in the Wimbledon Village and Wimbledon Park areas, has seen prices increase to amongst the highest in the outer London area and South West London.

